How to Use a Solar Battery Charger
Page Contents
Written by qualified solar engineer Aniket. Last updated:
Remember that time when you were on a train station and your phone battery was running low? And then you found a public charging kiosk. What a relief! We have all been there. Do you also remember the time you went hiking and had very low juice in your phone or iPad, and you wished there were public charging kiosks everywhere – even in the mountains?
Well, there actually are, with a small catch! Solar battery chargers allow you to charge your devices anywhere, all you need is some sunshine. They can be used to charge anything from cellphones to car batteries. Below we explain how to use a solar battery charger.
Understanding Solar Battery Chargers
There is a wide variety of solar chargers available in the market. Before we dive in to how to use them, let’s understand what these types of portable solar battery chargers are, and they are made up of. Solar battery chargers, as the name suggests – are devices that use solar energy to generate electric current that can charge portable devices such as a cell phone.
Solar battery chargers can be divided into two main types:
- Without an in-built battery
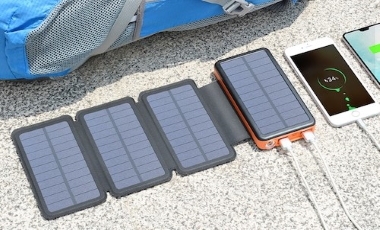
- With an in-built battery (a power bank with attached solar cells)


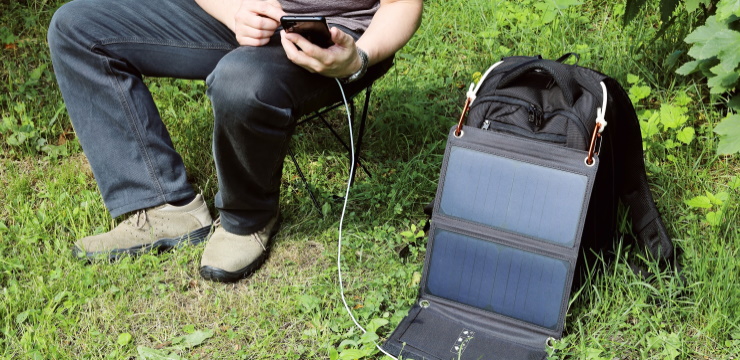
Solar chargers are portable and ideally lightweight devices which have solar cells encased into a durable structure. This can be made up of fabric, plastic, or both. In some cases, there are eyeholes that allow hanging the chargers in tents or backpacks.
As you might have figured by now, there’s not much rocket science involved in how solar battery chargers work. There are solar cells that send power to a battery or a junction, from which the power can be used to charge mobile devices.
How to Use a Solar Charger
It is a simple procedure to use solar battery chargers. The following is a stepwise guide to using solar powered battery chargers:
Place the charger:
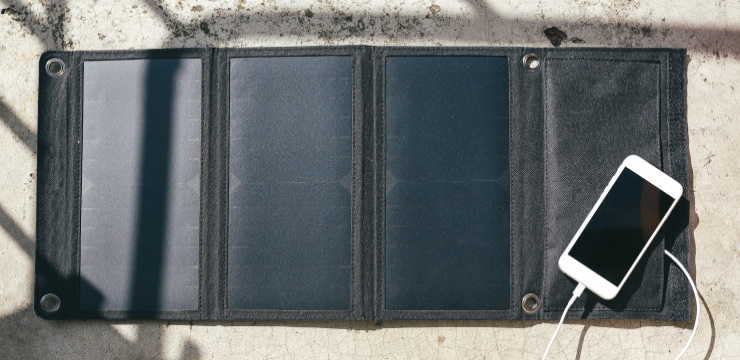
Unfold the charger (for foldable units), place it on a flat or slightly tilted surface. The charger should be placed in a way that the sun’s rays incident on the charger should be at or around 90 degrees. This helps harness maximum possible solar energy.
This may sometimes require placing the charger at an angle to the ground. In such a case, the eyeholes provided to some of the models can help secure the charger in place. Since these units do not come with mounting structures like traditional solar panels, you will have to work your way around them.
Connect the device:
a) For chargers without built-in batteries:
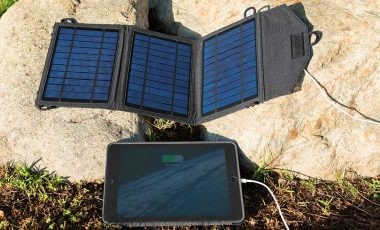
Place your cell phone/tablet on a flat surface near the charger and plug the USB cable into your charger’s output plug and the phone’s charging port. While the charger is supposed to sit in bright sunlight, avoid placing your phones or tablets under direct sunlight for long durations, especially when they are charging.
This might overheat the devices and possibly damage the electronics inside. Ideally, placing the charger near shade is best as the phone or iPad can then sit in the shade. But since that might not always be possible, a simple hack is to place the phone under the charger.
b) For chargers with built-in batteries:
These solar chargers do not need to be connected to the phone while in the sun. They can charge their built-in battery and the energy can be stored in the battery until being transferred to the phone or iPad.
Although in some cases it is possible to connect the phone to the solar power bank while it is generating power, it is not advised since the electronics are not optimized to charge batteries of cell phones and tablets directly.
Charging started:

Make sure your device shows that the charging has started. Try unplugging and plugging in the USB cable again if it hasn’t.
Monitor charging:
Since the level of solar energy is not always constant, it is a good idea to check the device for the level of charge after a few minutes. If the charging seems unusually slow, try realigning the charger so that the cells can receive direct sunlight. Do the same if the device stops charging. Clean off any dirt on the light collecting surface.
When charging devices of higher battery capacities, it may take a considerable time, in which case it makes sense to realign the charger as the sun moves throughout the day in the sky.
Wait until completed:
Leave the device connected until its battery is fully charged.
Best Times to Charge
As stated earlier, the solar charger will charge the fastest when it is exposed to maximum sunlight at a direct angle, just like regular solar panels. Obviously, the charger will not work during the night. But even during the day, charging during peak sunshine hours – usually 11am-4pm gives the best possible charging speeds.
It is also important to make sure to not use the charger during overcast or rainy conditions as diffused light can seriously reduce the power generation potential of the solar chargers.
Using a Solar Car Battery Charger
Some solar chargers can be used to charge car batteries. This can be particularly useful for off-road or remote driving where there is not much chance of assistance if the car battery runs low. Here’s a short guide on how to use solar car battery chargers:
- Park your car in a sunny, well ventilated spot.
- Attach the negative terminal/alligator clip of the charger to a ground location, such as the car frame.
- Connect the positive clip to the positive terminal of the battery.
- Make sure the solar panel/collector surface is placed in a way that it directly faces the sun.
Solar cells/panels generate direct current, meaning they can power batteries directly without the need of an intermediate device like an inverter.
Tips to Make the Most Out of Your Solar Battery Charger
Besides correct placement of the charger, there are a few other tips that will ensure you will get a good amount of charge for a longer period of time.
- Keep the surface of the cells clean and new – dirt, smudges and scratches reduce the light absorption and solar power generation, slowing down the rate of charging.
- Avoid placing the charger directly on hot surfaces like concrete or rock. Heat reduces the efficiency of solar energy production and affects the charger’s lifespan.
- For chargers with built-in battery banks, make sure the battery does not sit without use in fully empty or fully charged condition for long durations.
- Use an undamaged USB cable to ensure fast charging.
- You can always test a solar battery charger occasionally using a multimeter to make sure it is not degrading faster than the manufacturer states.
Choosing the Right Solar Battery Charger
Solar chargers come in a variety of sizes and charging capacities. While selecting a charger, it is important to understand your requirement. For example, people relying on the solar charger to charge larger or multiple devices should choose one that has more solar cells and a higher charging capacity.

Someone wanting to travel light, such as a backpacker, should opt for portability and light weight. A relatively small solar charger might suffice in this case – such as a basic, non-foldable solar power bank. Similarly, someone subjecting their solar charger to the elements more often should prefer a rugged and waterproof model.
References
- Making Solar Power Portable – NY Times
We hope you liked this article. Please rate it or leave us a comment.
Average rating 4.5 / 5. Vote count: 4
No votes so far! Be the first to rate this post.


