7 Best RV Solar Kits in [current_year] (Review)
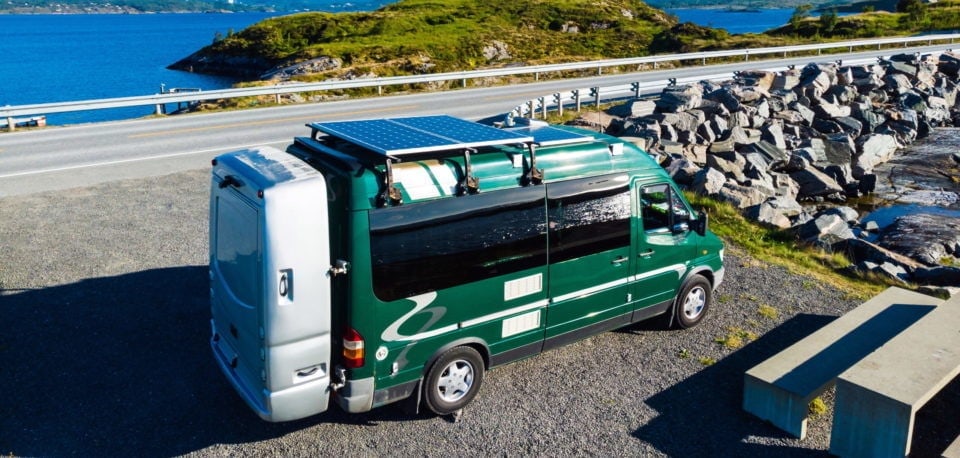
Some of the greatest experiences you will ever have will be crossing the country in your RV, exploring the U.S. with your family on a well-deserved vacation.
While you go on a trip you might find yourself at multiple destinations inside mountains, lakes, or beaches where no shore power will be available. That’s when an eco-friendly solution will become the most attractive option.
Solar energy is a free power source that can be used when you go on a trip by installing a simple portable solar system on the roof of your RV.
Written by qualified solar engineer Carlos. Last updated:
Page Contents
Here you will find a valuable guide of the best RV solar kits in [current_year] which will help you choose wisely, learn how to power your RV with a self-sustaining and eco-friendly power source, and make the right decisions when going solar!
Short on Time? See our Top Rated Products From 3 Categories

Renogy 100 Watts 12 Volts
- Corrosion-resistant aluminum frame
- Temperature and voltage sensors
- Multiple power options

ECO-WORTHY 100 Watts
- Corrosion resistant aluminum frame
- IP-65 junction box protection
- 4 stage charging
Where To Buy

WindyNation 400 Watt
- Can produce 1600Wh or 135Ah per day
- Aluminum and stainless steel brackets
- Perfect for 12V or 24V battery charging
Where To Buy
The Best RV Solar Kits
1. Renogy 100 Watts 12 Volts RV Solar Kit

Key Features:
- Corrosion-resistant aluminum frame
- Remote temperature and voltage sensors
- Multiple power options
Key Specifications:
- Monocrystalline solar efficiency: 18.4%
- 5400 Pa and 2400Pa resistance against snow and wind loads
- 16 ft 10 AWG tray cable
Renogy is one of the best solar brands in the off-grid market. Renogy solar kits often include monocrystalline panels, a charge controller, mounting hardware and more components that make it an attractive solution.
In this occasion, the Renogy 100 Watts 12 Volts RV Solar Kit for an RV includes a highly efficient 100 W monocrystalline solar panel with an efficiency of 18.4% and a corrosion-resistant aluminum frame that withstands 2400 Pa of wind loads and 5400 Pa of snow loads. There are other solar power kit options of 200 W, 300 W, and 400 W.
One of the best RV solar kits includes the Adventurer 30A PWM charge controller, aesthetically designed for RV flush mount applications. This device includes an advanced negative grounding to be coupled with batteries, remote temperature, and voltage sensors. It has its own internal electronics to protect the device and your batteries against a short circuit, overvoltages, reverse polarity, and overcharging.
Finally, the kit also includes MC4 connectors and a waterproof / UV-resistant cable entry housing.

2. WindyNation 400 Watt RV Solar Kit
Key Features:
- The kit will produce approximately 1600 Wh or 135 Ah charge per day.
- Anodized aluminum and stainless steel mounting brackets
- Perfect for 12 V or 24 V battery charging
Key Specifications:
- Dimensions: 101.6 x 3 x 67.7 inches
- Weight: 80 pounds
- 5-year warranty
Where To Buy
WindyNation manufactures some of the best RV solar kits in the US. The brand offers a wide range of products like polycrystalline solar panels, solar cables, MC4 connectors, monocrystalline solar panels, MPPT, and PWM charge controllers.
In this occasion, the WindyNation 400 Watt RV Solar Kit offers four 100-Watt solar panels, a 30A PWM solar charge controller with LCD screen, MC4 connectors, solar cables, and all that you need to install the kit.
The 100-Watt polycrystalline module is a great option for RVs, cabins and other off-grid purposes. The solar panel has been tested under low irradiance and high-temperature conditions and has proven outstanding electrical performance.
Also, the kit includes a 30A PWM charge controller with an LCD screen that shows voltage, amperage, ampere hours, temperature and DC load draw (if connected). The charge controller is ideal for your portable solar power bank because it has a battery temperature sensor, is compatible with AGM batteries, and is protected against short circuit, overload and reverse polarity.
3. SUAOKI Foldable 120W Solar Panel
Key Features:
- Water resistant module with IP65 protection
- TPE rubber handle and bracket stand, to mount at 45°
- Includes PET layer for scratch protection
Key Specifications:
- Dimensions: 70.8 x 20.9 x 0.4 in
- Net weight: 12.5 lbs
- Power output: 120 W
Where To Buy
Suaoki is a company focused on providing portable power supply solutions to the market. Products include foldable or flexible solar panels, power inverter options, and reliable portable power stations.
In this case we highlight a great flexible option to the RV market. SUAOKI 120 W Monocrystalline Solar Panel has an efficiency of 20% and has a stronger absorption capacity under low-light conditions than other modules. This particular model can also be used as a solar panel kit for camping.
Moreover, the great advantage for RVs is that the module can be curved up to 30° which is very useful trailers, vans or boats where many available surfaces are not completely flat. The Suaoki panel is also water resistant with IP65 protection and weighs only 7.1 lbs.
As with other flexible modules, this product is designed with a frameless designed and four metal reinforced mounting holes that make the installation much easier and faster, as only suction cups are needed to be introduced in these holes. On the other hand, the panels come with a 2-year warranty that will ensure you a good performance of the product in that period of time.

4. ECO-WORTHY 100 Watt
Key Features:
- Corrosion resistant aluminum frame
- IP-65 junction box protection
- 4 stage charging
Key Specifications:
- Power output: 100 W
- 12/24 V battery bank charging
- Antireflection coated glass included in the polycrystalline solar panel
Where To Buy
The ECO-WORTHY 100-Watt solar panel kit is a simple and portable solution for campers that are looking for easy installations.
The kit includes a 100W polycrystalline solar panel ideal for a 12V battery with a corrosion resistant aluminum frame and a 20V open circuit voltage. The 100W polycrystalline module also includes an IP-65 rated junction box to protect it against low-pressure water jets (when doing the cleaning for instance) and small environmental particles.
As one of the best portable solar charger kits, the product includes a 20A PWM solar charge controller that provides short circuit, over current, over discharge, overcharge, open circuit and reverse polarity protection. In other words, your solar power bank will be completely electrical failure proof.
The solar charge controller also offers 5V dual USB ports for smartphone charging and a 4-stage charging (bulk, absorption, floating and equalization) intended for 24V or 12V batteries.
The kit also includes a red and a black 16 foot solar cable with MC4 connectors to make an easy installation.
5. Newpowa 200W Monocrystalline
Key Features:
- Heavy-duty anodized aluminum frame
- IP-65 junction box protection
- 5 stage charging
Key Specifications:
- 99% tracking efficiency of the charge controller
- 12V battery bank charging
- Power output: 200 Watts
Where To Buy
The Newpowa 200W Monocrystalline is a high-cell-efficiency solar kit that has a high light converting rate. With a maximum power of 200 watts, this solar kit will take care of your lighting needs.
Boasting a corrosion-resistant aluminum frame panel, this will be something you’ll use for a long time. Even better is the fact that the Newpowa Monocrystalline can withstand both strong winds and snow.
The panel’s output is compatible with a majority of solar systems, especially those with 12-volt or 100-watt charging systems. However, in order for this solar kit to charge properly, it should be connected to a charge controller.
The panel also comes with the standard IP65 junction box and a bypass diode. This tells you that it is ready to light your world.
Finally, the Newpowa Monocrystalline has a 25-year performance warranty. This lets you know that this solar kit will work exactly as intended.
6. Renogy 100 Watt 12 Volt Monocrystalline
Key Features:
- MPPT solar charge controller for maximum power performance
- IP-65 rated junction box
- Anti-reflective and low-iron tempered glass
Key Specifications:
- 99% tracking efficiency of the charge controller
- Efficiency: 18.35%
- Power output: 100 W
Where To Buy
The Renogy 100 Watt 12 Volt Monocrystalline RV Solar Kit is one of the best RV solar panels from the brand that includes a 100 watt solar panel, an MPPT charge controller and other components needed to install the kit.
The Eclipse module is a monocrystalline solar panel with highly efficient cells that allow you to have 18.35% conversion efficiency. As with other modules, the junction box includes bypass diodes to reduce the impact of shades and ensure good performance under low-light conditions. It is also protected against low-pressure water jets and small particles.
The reason why we can consider this as one of the best RV solar kits is that the kit includes a 20A MPPT charge controller. As we have discussed previously, the great advantage of an MPPT model is focused on tracking the maximum power point of the I/V curve at 99% efficiency.
This means that the charge controller finds the maximum power point (MPP) of the solar cells and charges the battery at 12V while increasing the electric current to match the MPP. Therefore, your MPPT solar charge controller will have a much better performance than any other kit with a PWM model.
7. KOMAES 200 Watts Polycrystalline
Key Features:
- Tempered glass with 93% light transmittance
- Anodized aluminum frame
- Drainage holes included in the borders of the frame
Key Specifications:
- Power Output: 100 W
- Dimensions: 1200 x 550 x 35 mm
- Weight: 8.2 kg
Where To Buy
KOMAES is a Chinese manufacturer of portable solar kits, pure sine wave power inverters, and charge controllers for off-grid purposes.
The KOMAES 200 Watts 12Volts polycrystalline solar panel kit tech kit is a simple starter kit to provide you with an off-grid solution for your RV. It is composed of two 100-Watt panels that together can produce almost 1000 Wh per day.
Each polycrystalline panel is manufactured with high resistant aluminum frames that have pre-drilled holes to make a fast and safe mounting. The solar panel is also designed with tempered glass that withstands wind loads of 2400Pa and snow loads of 5400 Pa and its performance warranty is of 25 years.
The KOMAES kit also includes a solar charge controller with PWM technology and a 20 Amp output, along with a pair of 20 ft tray cables and 20ft MC4 solar cables.
Other wattage outputs are available for 100 W and 400 W.
How Do RV Solar Kits Work?
To live completely off-grid and use solar energy to power your appliances, you must purchase an RV solar kit.
RV solar system kits are composed of several electronic devices that we must analyze in order to understand how they work.
Solar panels are electronic devices that convert sunlight into electricity. They use the kinetic energy from small particles contained in light (called photons) to release electrons that generate DC electricity.
Charge Controllers
Charge controllers are electronic devices that set the electrical output at the nominal voltage of the battery bank (typically 12 V or 24 V for RV purposes) and stabilize the current values from the solar panels to safely charge your batteries.
There are two main types of charge controllers. The Pulse Width Modulated (PWM) model and the MPPT charge model.
The PWM charge controller sets the voltage output at 12V or 24V and supplies the corresponding current in the I/V curve of the solar panel. On the other hand, the MPPT charge controller locates the maximum power point of the panel to optimize the power output while effectively charging the battery. In simple words, the MPPT model allows you to obtain higher energy yields than the PWM charge controller. However, since MPPT models are more expensive and an RV solar kit generally has a low power size, the pulse width modulated model is used more frequently in RV solar kits.
Finally, the last component is not generally included in the solar kit, but it is essential for any RV solar system: the power inverter. This device converts the DC power into the AC electricity that our electronics and appliances use. The input of the power inverter is connected to the battery and the output is connected to the electrical panelboard of the RV. These products can be either pure sine wave or modified sine wave.
If you want to know more, you can see a schematic of all the solar components inside an RV.
How Well Do RV Solar Kits Work?
RV solar kits are generally associated with thin-film technologies that have been designed with silicon wafers of 200 micrometers thick (slightly thicker than a human hair). This design makes them extremely lightweight and flexible enough as to bend around 30 degrees without breaking apart (very useful for curved roofs in RVs).
Moreover, they have a frameless design and they can hide easily thanks to their thin plastic sheet. Also, they can be easily glued onto the roof without any mounting hardware or any perforations, making the installation process easier and faster.
The main disadvantage of flexible panels is related to heat dissipation and product warranties. Since they are glued onto the roof, they do not have any air circulation on the backside to cool down the solar cell, this translates into higher thermal losses. Also, performance warranties are only 5 years and product warranties only 2 years.
On the other hand, rigid panels are the typical models that we can find in households that have installed a PV system. They have an anodized aluminum frame, tempered glass, and monocrystalline or polycrystalline solar cells to convert sunlight into electricity. These modules have been established as reliable, highly durable, and they’re even classified as the most efficient solar panels in the market.
Rigid RV modules are designed to last up to 30 years with performance warranties that guarantee at least 80% efficiency over 25 years. They are also tested to endure severe environmental conditions with snow load and hail tests. In addition, they have excellent performance in hot summers because they have better air circulation on the backside.
As you can see, flexible panels are best suited for RVers that go on short trips so the modules won’t overheat. Meanwhile, the rigid ones are ideal for boondockers that live off-grid for a long time.
How Much Power can They Run?
Each PV system is different because each design will change depending on how much power the customer uses. However, we can estimate some typical appliances inside an RV.
Appliance | Estimated Power Consumption (W) | Estimated Hours of Daily Use (h) | Energy Consumption (Wh) |
Small LCD TV | 25 | 3 | 100 |
Fans | 25 | 4 | 100 |
14-15” laptop | 60 | 6 | 360 |
LED Lighting | 30 | 4 | 120 |
Microwave | 800 | 0.2 | 160 |
Water Pump | 100 | 0.5 | 50 |
Smart Phone | 5 | 3 | 15 |
Refrigerator for RV | 150 | 8 | 1,200 |
Total | 2,105 |
As we can see the most demanding load draw is the refrigerator. If we take into account only the remaining loads, we would only be accounting for 905Wh per day, which we can round up to 1000Wh.
In order to compare with a deep cycle battery capacity, we need to convert watt-hours (Wh) units into ampere-hours (Ah). Nominal battery bank voltages are 12 V or 24 V, so if we divide energy into watt-hour units by voltage, we obtain ampere-hours.
In our case, if we use 24V (two 12V batteries in series) and 1000Wh energy consumption, we could translate it into 41-ampere hours. Therefore, with a 50 Ah battery bank capacity, you could power those loads every day. Using a 200-watt solar kit for an RV could be enough to completely charge a 50Ah battery bank of 24V in a couple of days and increase your grid independence.
However, if we factor the refrigerator in the balance, we would have 2,105Wh of energy consumption. It is important to know that despite the refrigerator is used across the whole day, we do not take into account the whole 24 hours, but only use 8h as reference for the duty cycle in which the compressor is working. Another more common and valuable approach is using the annual energy consumption that is generally provided by the manufacturer and take it to daily consumption.
If we apply the same procedure but add two more batteries to have a 48V system, then we would need 44Ah daily. This can increase costs radically, but you would be able to power all appliances with the same solar panel array and by adding two more batteries in series to reach the 48V.
How Many Do You Need?
As we mentioned before there are many appliances that our RV solar power kits can run for us. However, you may be asking yourself how many panels you need.
The first thing that you must do is make a load demand table. Then, you must apply this simple equation to estimate the amount of power needed to run your appliances within a single day.
Ed stands for energy demand, Irr means irradiance in kWh/m2/day, and k is referring to a derating factor. The irradiance values vary according to the location, season, and year. Since it is hard to accurately predict the irradiance values on portable RV solar kits, it is recommended to estimate an average value according to the regions that you regularly visit. The National Renewable Energy Laboratory (NREL) offers us an intuitive solar resource map of every State across the US that we can use. You can check the resource map here
For instance, if you are located in Colorado, we can estimate the irradiance values between 4 and 7.3 kWh/m2/day. If we assume and average of 5.5 kWh/m2/day and energy consumption of 1,000 Wh, then we can apply the equation.
We could use solar kits for RVs with 300 W of maximum power to cover the energy needs of our appliances within a single day. The same procedure can be used to estimate the solar power that you need.
Keep in mind that the k factor is referred to the balance of system efficiency values from NREL. It represents the typical losses in any off-grid solar system including the PV module tolerance, mismatch losses, AC and DC wiring, soiling, power inverter´s conversion efficiency, and battery round trip efficiency.
What Size Do You Need?
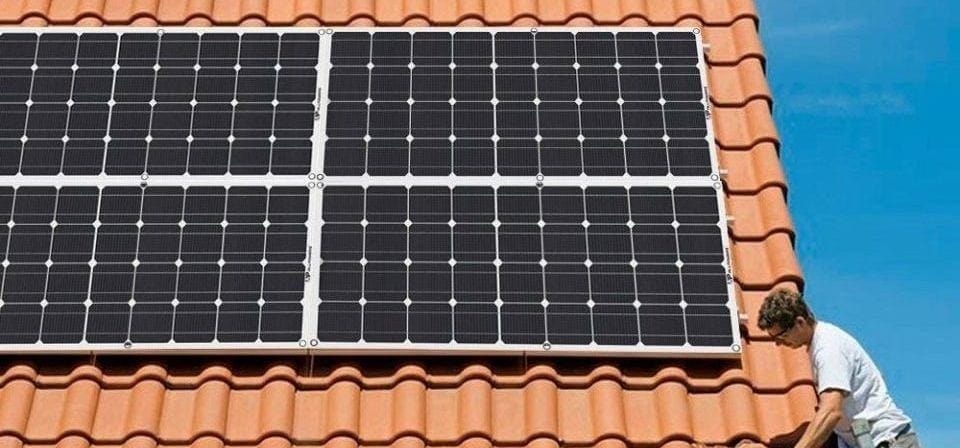
To invest in a solar system, you need to keep in mind the power output that we calculated in the previous section. That value represents the maximum power that you need for your solar system.
Solar panels have many maximum power values. Most solar kits for RVs have 200-watt or 100-watt sizes, but that does not mean that you cannot expand your off-grid system. You can also purchase extra portable solar panels to increase your grid independence and power more loads.
Actually, you can choose several small-sized 50W panels (just as the flexible module from SunPower) to have a 300W system. Or you can purchase three PV panels with a higher wattage (100 W) to cover the same amount of power.
Purchasing modules with a higher wattage reduces the number of modules and costs as well. But it also means installing a bigger panel, and you may not have enough space to cover the amount of power that you need.
A 200 W solar panel from SunPower can be 1,500 mm long and 800 mm wide. Do you have enough space on your roof for that? No? Then, try with 100W panels (1100 x550 mm).
Can you put two 100W panels right next to each other to obtain a 200 W power output? Is it better than placing four 50 W panels?
The available roof space in every RV is different, therefore there is not a simple answer. You must ask yourself these questions and try several configurations to find which is the best option for you.
Another important fact to take into account is weight. Flexible panels have the great advantage of being lightweight, while the rigid ones are much heavier and require mounting hardware. Based on this decision, the available sizes for a solar panel will change.
How Do You Install the Kits?
Once you have purchased your solar kit, the next step is the installation process.
If you are up for DIY projects, then installing a solar power system kit is a nice challenge for you.
Once you have opened the box, separate each component and try to visualize the whole schematic. Then, follow these easy installation steps:
- Check if you have every component ready: solar panels, charge controller, mounting hardware, cable entry plate, AWG solar cables, battery wires, fasteners, bolts, fuses, and breakers.
- Verify the conditions of the products and if possible, buy an additional tilting kit that will help you maximize the solar power that your panels can produce.
- Install the mounting brackets in the solar panels while you are on the ground.
- Measure the size of the module and compare it with the available roof space on the RV.
- Draw a schematic of the positions where you will install each panel. Having a clear idea of where to place each module before you go to the roof will help you a lot. Keep in mind that you need to place the panel as far away as from any object that could cause shading as possible.
- The charge controller is easy to install, but you need to place it as close as possible to the batteries in order to minimize DC wiring losses. Locate an area where you could place it and install it using simple screws.
- Examine your RV and imagine the shortest possible path from the roof to the charge controller. Longer distances or low AWG solar wire sizes will translate into higher voltage drops and power losses.
- Once you have decided the path, the next step is drilling a hole through your roof to pass the AWG solar cables. Once the wires reach the charge controller, it is time to install the electrical protection devices to cover your investment against a short circuit.
- Install DC breakers between the cable run and the charge controller. Keep in mind that you need to install the DC breakers in an easy access location, just in case that you need to turn off your solar system quickly. These are easy to install.
- Install fuses between the charge controller and the deep cycle batteries to protect them from any overcharge. Then, connect the battery bank to the PWM charge controller using battery sized wires.
- Now it is time to install the waterproof cable entry plate with the MC4 connectors that should be connected to the 10 or 12 AWG solar extension cables. Use waterproof tape and a sealant around the cable entry plate to make sure you are totally waterproof.
- Drill the holes for the mounting hardware and install each panel on its position. Solar panels are easy to install, you just need to secure them to the roof.
- Make the corresponding series or parallel connections between the modules. Use the MC4 connectors and extension AWG solar wires to connect them with the cable entry plate. Remember, series connections add voltages, while parallel connections add electric currents. Check your charge controller’s voltage and electric current range before doing this.
For ease of installation purposes, keep a small note inside your pocket to remember numbers and steps. Also, if you are looking for a PV system that is easier to install, choose flexible panels. You will avoid the need to drill holes and install mounting hardware for each module.
How Do You Ground Everything?
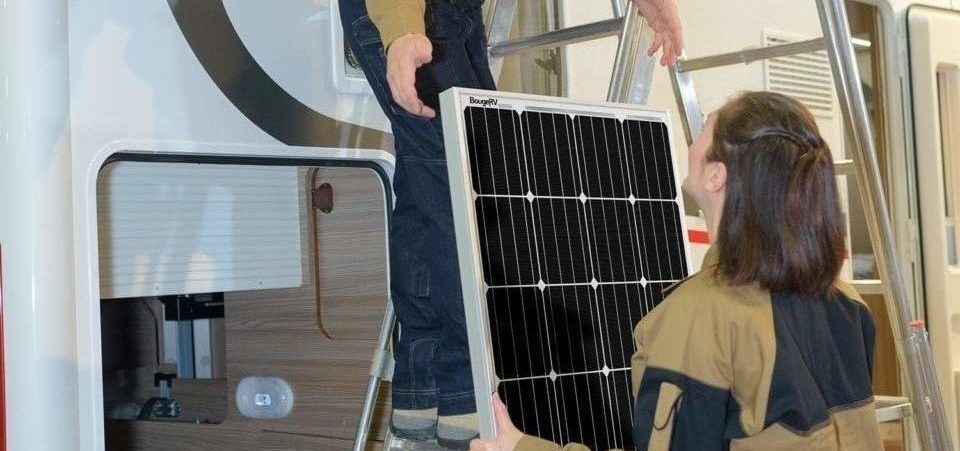
An off-grid power system also requires to ground the solar panels. Grounding is necessary to provide a safe pathway to any possible short circuit that may occur. Moreover, grounding your modules also ensures that you will always be able to touch them without any danger.
The grounding is easy to install.
The first step is choosing a small size AWG cable. Remember that there will be many cables in your RV, so to guide yourself, choose a green color for grounding.
Then, you must connect this wire to the aluminum frame of every module. Keep in mind that there can only be a single ground wire for all the panels
Once you have connected all your modules system with the same ground wire, you must send it through the cable entry plate to your RV. It will reach the room where the charge controller is located and it must continue to the base of the RV (via conduit if it passes through propane or batteries).
Once there, drill another hole to the chassis of the RV and send the wire through that hole. Finally, you must bolt the ground wire from the panels to the chassis. Keep in mind that the pulse width modulated charge controller and the sine wave power inverter will also need to be grounded, and you must do it to the same reference spot.
How Do You Test Them?
Testing a solar panel is really easy. All you need is a digital multimeter.
Each module brings a nameplate on the backside with all the electrical output specs. Among those, two are crucial for our test. The open circuit voltage and the short circuit current. The first one represents the maximum voltage output and the latter represents the maximum electric current of the panel.
Choose a sunny day to make the test, and at midday, place the panel with direct sunlight exposition. The junction box is located behind the module where two MC4 connectors are located. One represents the positive lead and the other one represents the negative terminal.
You must measure the voltage using the digital multimeter and it should be slightly different from the open circuit voltage that appears on the nameplate. Meanwhile, the measured amount of current should be very similar to the short circuit current.
How Do You Winterize Them?
If you will continue using your solar kit during winter, the first thing that you must consider is tilting your panels South. You would be amazed at how much power you could draw by tilting your modules during the winter season. You do not need to worry about snow on top of the modules because the snow melts down as the panels produce energy.
However, if you are an occasional RVer and the snowfall is coming, you will need to winterize your solar power system.
The first thing to keep in mind is to turn off the DC breaker of the solar power system. Then, disconnect the wires that go from the charge controller to the battery bank.
Afterward, cover the panels with a black protective material that does not allow light to pass through. Remember that even when you are inside your home, the panels can generate some electricity with artificial light, so be careful handling them.
More than getting worried about the panels during winter, you should be careful with your batteries. In order for them to have a long lifespan, you must store them in a safe, dry, and warm place with limited humidity. Keep in mind that you shouldn’t discharge your batteries below 50 % and that you should complete a 4 stage charging before storing them.
Batteries get discharged over time, so make sure you charge a battery at least once every 1 or 2 months and remember to do maintenance as well. Choose AGM or GEL batteries to reduce the required maintenance.
How Do You Protect Them From Hail?
RV solar systems are exposed to outdoor conditions all the time. Constant and abundantly salty environments can lead to corrosion in the panels, soiling can reduce their efficiency, and hail storms can impact your modules at any time.
However, the solar industry is aware of this. Manufacturers have designed their panels in order to endure severe environmental conditions. Every module must pass through quality tests to ensure it will be able to withstand standard climate conditions. These tests include thermal cycling, damp heat, twist, hot spot, hail impact tests, and more.
The typical hail impact test involves throwing multiple 25 mm ice balls at 23 m/s against the panel’s tempered glass in different spots.
Basically, tests and experiments around the world have proven that it is highly improbable that your solar panel will break due to a hail impact since it is designed to resist it.
Nevertheless, if you are still skeptical and want to protect your solar panel kit against hail, you have two choices. The first is insurance. The second involves installing an iron or aluminum frame on top of the panels, ideally a little above the surface of the module. Also, you could use the foam included in the box to cover it and fasten it with a rope. That way the PV generators won’t receive the direct impact of hailstones. However, it could be a complex and unnecessary procedure.
We hope you liked this article. Please rate it or leave us a comment.
Average rating 4.9 / 5. Vote count: 16
No votes so far! Be the first to rate this post.


