Portable Solar Panel System Set Up Guide
Page Contents
Written by qualified solar engineer Aniket. Last updated:
Have you ever looked at solar panels installed on buildings and wondered if you should get them? You probably would like to set up a small, portable solar system and get a first-hand experience on how to do it. Or maybe you are just a DIY-buff.
In either case, we’ve got you covered. This portable solar panel system set up guide will walk you through the steps in setting up your system – from sizing, component selection to the wiring and operation. Whether it’s for home use, camping, or for an RV, portable solar kits are a great way to ensure power supply away from the grid or during blackouts. Let’s see how to design and build portable solar kits.
Step 1 – The Power Requirements
Whether you want to set up a home solar panel system or a portable system, the first step is understanding the energy requirement.
Solar power is an extremely flexible source of power when it comes to size. You need to first decide how big a system you need, i.e., the amount of power required. The first step is to create a list of appliances that you want to power from your portable solar panels. This can include anything from some LED lights, mobile phones, a small table fan, or a coffee maker.
Next, add up the power consumption of these devices. Suppose the lights total 30 watts, mobile phones 10 W, the fan 20 W, and 30 or 40 W for other small devices.
Step 2 – The Solar Panels
Once you have calculated the amount of total power required, it is time to decide the size and type of solar panels. Let us assume that considering the appliances mentioned above, your total power requirement is 80 W.
In this case, it would be reasonable to go with 100-watt solar panels, accounting for efficiency losses and unpredictable sunlight levels.
You can either have a single 100 W, 12-volt monocrystalline solar panel or two 50-watt solar panels. You can choose between regular panels, flexible panels, and rugged, portable solar panels.
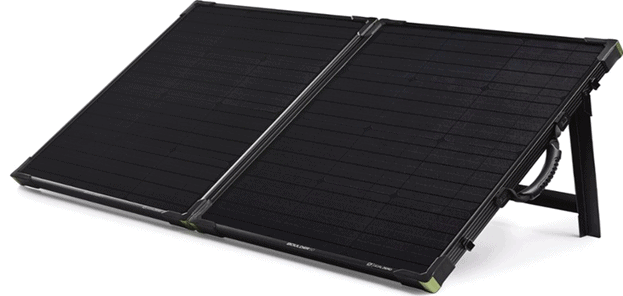
Although all solar panels function the same at the fundamental level, each of these has its advantages. Regular, rigid solar panels are the least expensive, while flexible solar panels are extremely durable and easy to carry.
Portable solar panels come with protected edges, making them slightly more durable. It’s easy to set them in the right position, thanks to mounting kickstands. It is thus convenient to install a solar panel system using portable modules. Portable folding solar panels are another, more compact option.
Step 3 – Battery and Charge Controller
A battery is needed to use solar energy during the night, and a solar controller for safe battery charging. Before deciding what size of batteries to buy, we need to know how much energy needs to be stored. The 100-watt, 12-volt solar panels we decided upon will generate about 400 Wh of energy, assuming you are at a location with 4 hours of full sunshine availability.
To have a battery bank that can store the entire 400-watt hours, the following calculation should give us the battery size in ampere-hours (Ah):
Wh ÷ V = Ah
Hence, 400 ÷ 12 = 34 Ah
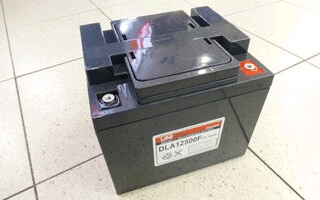
Considering some buffer for battery efficiency and depth of discharge (the actual discharging level a battery can handle), it would be better to go with a 50 Ah or 60 Ah battery. Different types of batteries are available for solar kits, but to minimize maintenance hassles, go for sealed maintenance free options – either lead acid or lithium batteries. Preferably deep cycle batteries, if you want more energy per volume.
 | 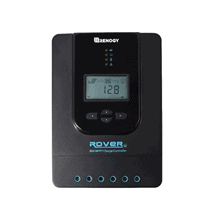 |
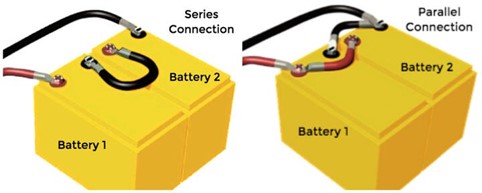
A solar charge controller is necessary for safe and optimal solar charging. In this case, you can go with a 12 V or 24 V charge controller. If you are going with a 24 V battery charge controller, you will need to have a 24 V battery bank; thus, you can have two 30 Ah, 12 V deep cycle batteries connected in series instead of one 50 or 60 Ah, 12 V battery.
Among the two types of solar charge controllers, PWM charge controllers are cheaper but also less efficient. The costs for battery charge controllers have dropped significantly in recent times. It is always recommended to set up a solar panel system using an MPPT controller to get maximum value from your system.
Step 4 – The Inverter
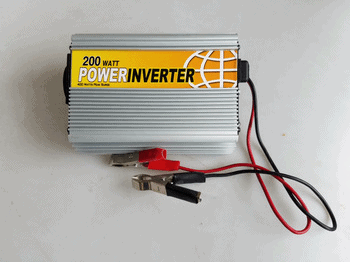
A power inverter is necessary to convert DC power from your solar panels or batteries to AC. You can use DC supported appliances that your batteries power directly, eliminating the need for an inverter. However, it is recommended to have an inverter-based system to operate regular appliances as well.
The inverter should handle the power conversion when all the appliances are being operated simultaneously, while also having some safety margin to account for a possible power surge. In this case, a 200-watt power inverter would be a suitable option. Pure sine wave inverters are recommended for their higher efficiencies.
Step 5 – The Wiring
Now comes the most critical part of installing your own solar panel system – wiring. If you are going with a 12V system, you can have a single 100 watt 12 volt panel or connect your 2 x 50 W panels in parallel. If you are setting up a 24 V system, connect them in series by connecting the positive terminal of one panel to the negative of the second. The procedure is the same for regular or flexible solar panels. A solar panel system installation with two panels is usually more complex than single-panel systems.
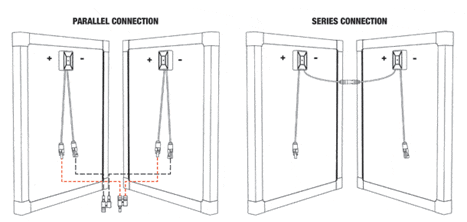
The same goes for the battery. If your system is a 24 V system, you will need to connect the battery terminals in series as shown below:
Your power inverter’s input rating will decide whether your system will be 12 V or 24 V.
Finally, there is the wiring of all the components together. The following is an easy wiring diagram that you should follow:
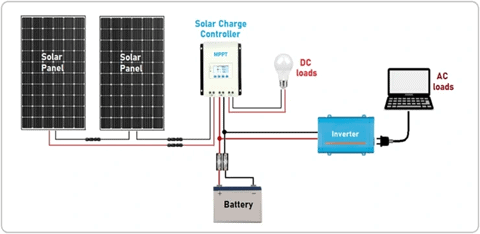
While setting up a solar panel system, ensure the panels are not exposed to the sunlight, as DC current can be harmful. It is crucial to connect or disconnect solar panels safely. Once all the connections are done, you can set up your panels facing sunlight directly at a suitable angle, hence starting your solar charging. Make sure your panels remain clean and scratch-free for the best experience.
Portable systems are a great way to power your essentials. They are also quick to set up, whereas rooftop solar panels take about 90 days to be installed.
You can always add more panels and batteries to it to increase your system capacity. Use the same step by step guide to design the extension to your portable power generator or get one of the starter kits and directly connect to your existing system.
We hope you liked this article. Please rate it or leave us a comment.
Average rating 4.6 / 5. Vote count: 27
No votes so far! Be the first to rate this post.

